Create your first ticket
When you open a ticket, you enter the workspace where planning meets execution. The Umaku ticket view is designed for clarity, allowing you to define complex requirements while maintaining technical precision.
In Umaku, a Ticket is more than just a task on a to-do list; it is a context-aware unit of work that bridges project management and software development. Unlike traditional platforms, a Umaku ticket connects your written requirements directly to your code commits, allowing AI agents to assist with verification and quality control.
This guide explores the anatomy of a Umaku ticket, how to create one, and how to manage its lifecycle on the Board.
1. Anatomy of a Umaku Ticket
Section titled “1. Anatomy of a Umaku Ticket”When you open a ticket, you enter the workspace where planning meets execution. The Umaku ticket view is designed for clarity, allowing you to define complex requirements while maintaining technical precision.
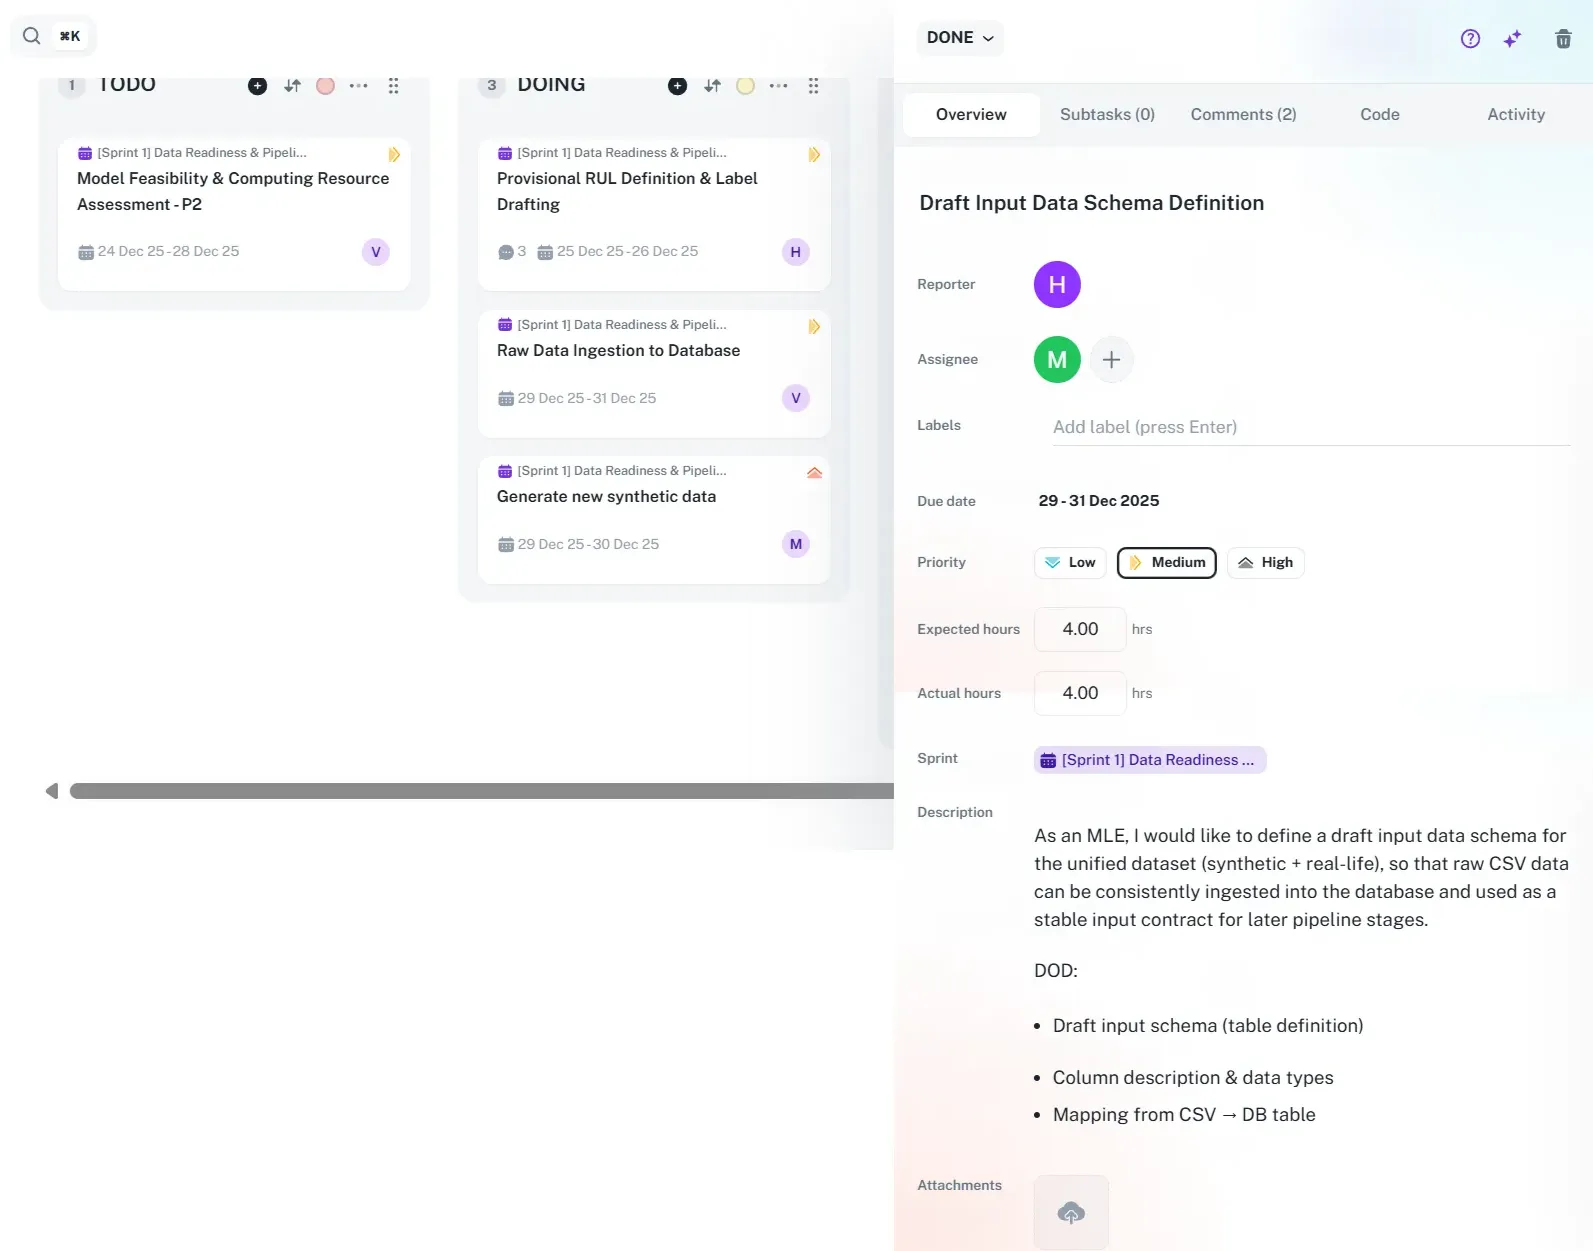
Figure 1: The comprehensive ticket view showing description, acceptance criteria, and metadata.
Key Components:
- Rich Text Editor: The Description and Acceptance Criteria fields support full formatting (similar to Google Docs or Word), allowing you to structure deliverables clearly with bullet points, bold text, and headers.
- Smart Metadata:
- Assignees & Labels: Quickly route work to the right team members.
- Priority: Set urgency levels (Low, Medium, High) to guide the AI’s “Descoping” suggestions later in the sprint.
- Time Tracking: Input Expected hours for planning and log Actual hours to track velocity.
- Sprint Context: Tickets are assigned to specific sprints (e.g., Sprint 4 - Performance), linking them to the broader project roadmap.
2. The Umaku Board: Where Tickets Live
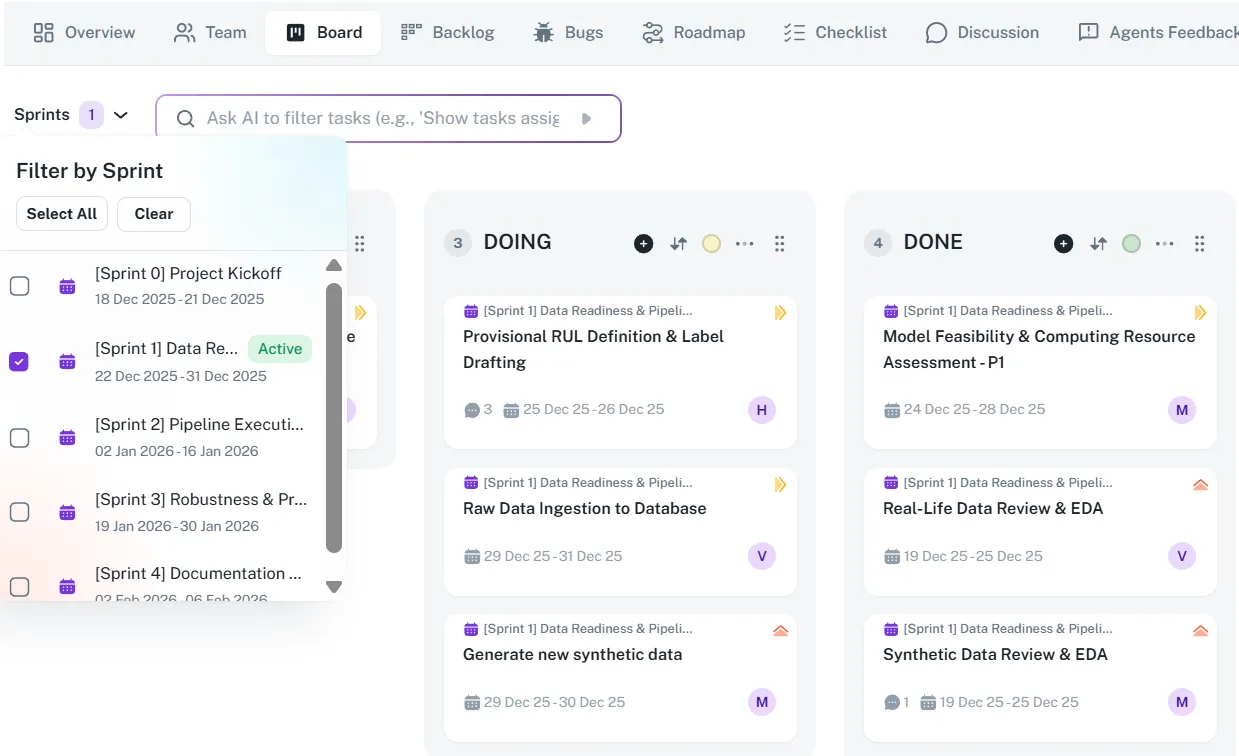
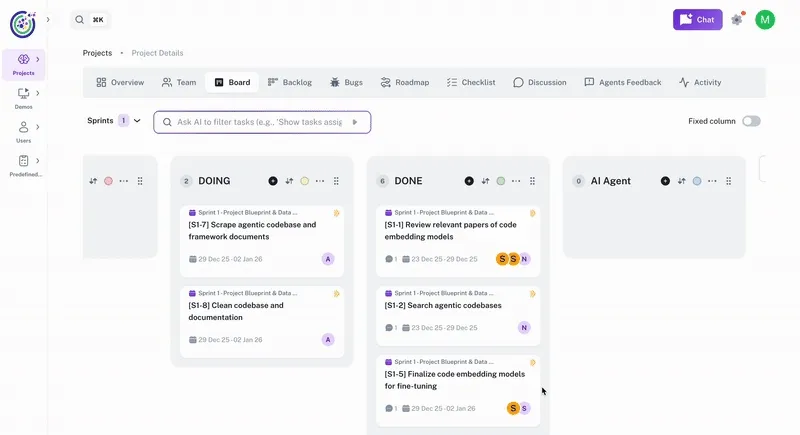
Section titled “2. The Umaku Board: Where Tickets Live”Once created, your ticket resides on the Umaku Board. This is the visual hub for your team’s current sprint. Umaku automates board management—whenever a sprint is created in the Roadmap, a corresponding Kanban board is automatically generated.
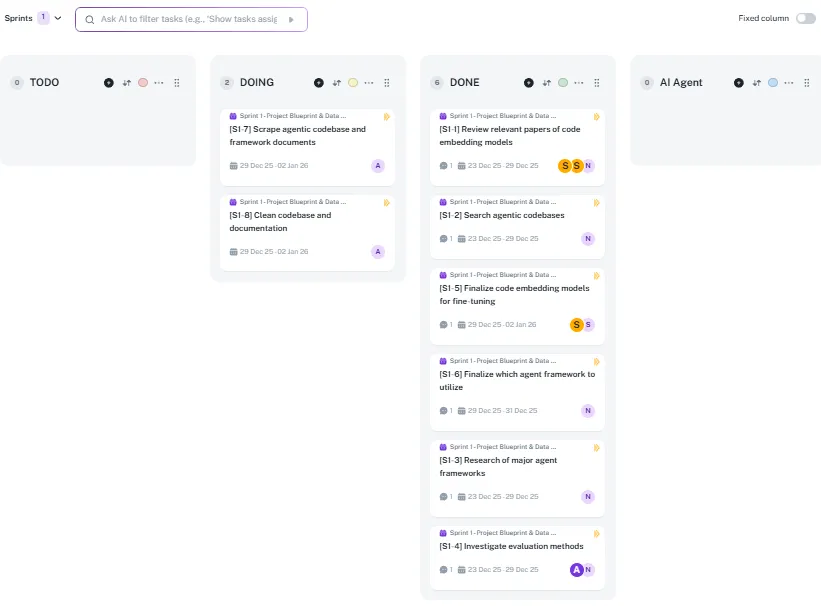
Figure 2: The Umaku Board view showing the Sprint selector, AI Search bar, and Kanban columns.
Managing Your Workflow:
- Columns & Status: Tickets move through columns like TODO, DOING, and DONE. You can customize these columns to match your workflow (e.g., adding a “QA” column) by editing the board settings. Admins can also toggle “Fixed column” to lock critical stages.
- AI Search: Located at the top, the AI Search bar allows you to filter the board using natural language (e.g., “Show tasks assigned to Sarah that are blocked”), giving you instant visibility into specific subsets of work.
- Drag & Drop: Easily move tickets between columns or reorder them within a column to adjust priority.
3. Linking Code to Tickets
Section titled “3. Linking Code to Tickets”Umaku distinguishes itself by understanding the code associated with a task. To enable AI features, you must link your development activity to the ticket.
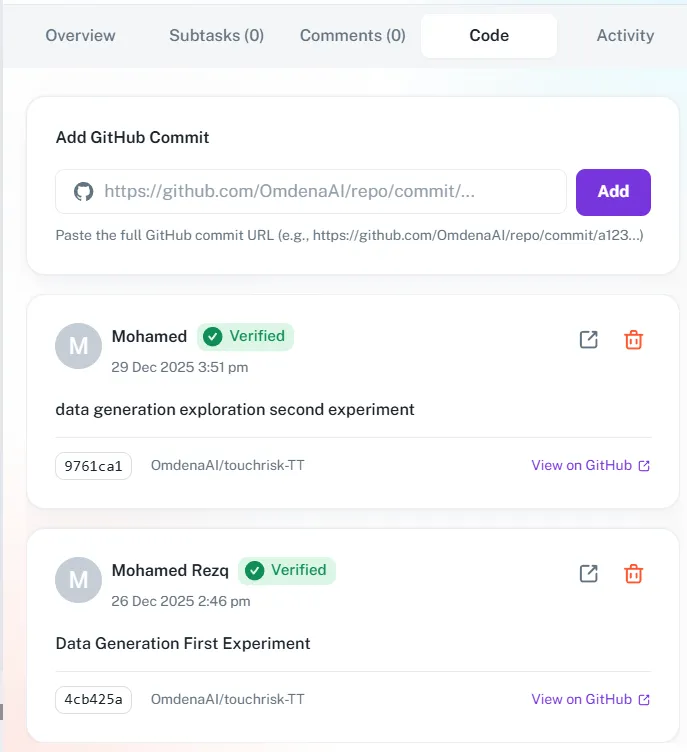
Figure 3: The Code tab where users manually link GitHub commits to the ticket.
How it works:
- Navigate to the Code tab within the ticket.
- Paste the full GitHub commit URL into the input field.
- Click Add. Umaku will verify and log the commit (displaying the author, timestamp, and commit message). This link allows the AI Agents to “read” the code you wrote for this specific task.
4. Triggering AI Code Review
Section titled “4. Triggering AI Code Review”Before moving a ticket to “Done,” you can request an instant AI review. The agent compares your linked code against the ticket’s Acceptance Criteria and project standards.
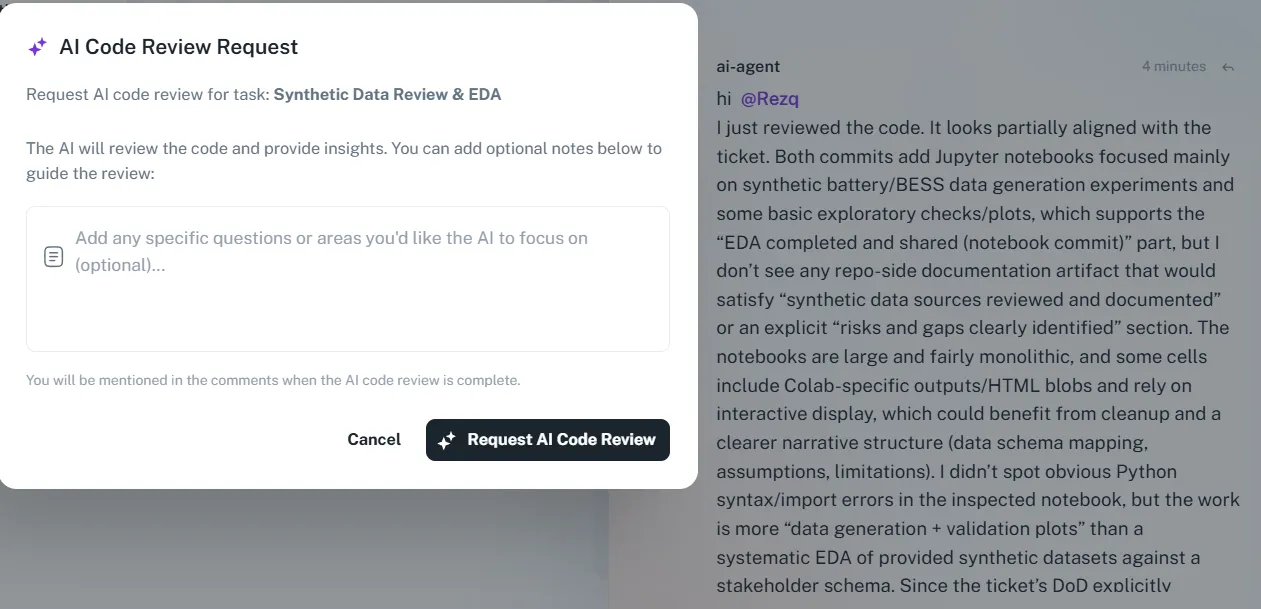
Figure 4: The AI Review Request modal triggered by the “Sparkles” icon.
The Review Process:
- Initiate: Click the Sparkles icon (✨) located in the top-right header of the ticket.
- Add Context: A modal will appear allowing you to add optional notes (e.g., “Check for security vulnerabilities in the API endpoint”).
- Feedback: Once you click Request AI Code Review, the agent analyzes the work and posts its findings directly in the Comments section, mentioning you so you don’t miss the feedback.
Tutorial
Section titled “Tutorial”Create and Manage Your First Ticket
Section titled “Create and Manage Your First Ticket”In Umaku, a ticket is the fundamental unit of work. However, unlike traditional project management tools, an Umaku ticket is context-aware. It doesn’t just describe the work; it listens to your code commits and uses AI to help you verify quality.
This guide will walk you through the entire lifecycle of a ticket: from creation on the board to linking code and requesting an AI review.
-
Find Your Board
Section titled “Find Your Board”Every Sprint in Umaku automatically generates its own Kanban board. To start working, you need to locate the board for your current sprint.
- Select Project: Navigate to your project (e.g., CodeMode AI) from the left sidebar.
- Open Board View: Click the Board tab in the top navigation.
- Choose Sprint: By default, Umaku shows the active sprint. If you need a different one, use the Sprints dropdown in the top left.
-
Create a Ticket
Section titled “Create a Ticket”You can create a ticket instantly directly on the board, ensuring you don’t lose context while planning.
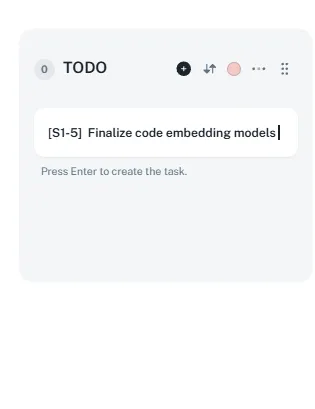
- Locate the Column: Find the column where the work should begin (usually TODO).
- Quick Create: Click the + (Plus) button in the column header.
- Enter Details: A modal or inline card will appear. Enter the ticket title and press Enter.
-
Define Ticket Details
Section titled “Define Ticket Details”A created ticket is just a placeholder until you define the work. Umaku allows for rich, detailed specifications. Click on any card to open the Ticket Details View
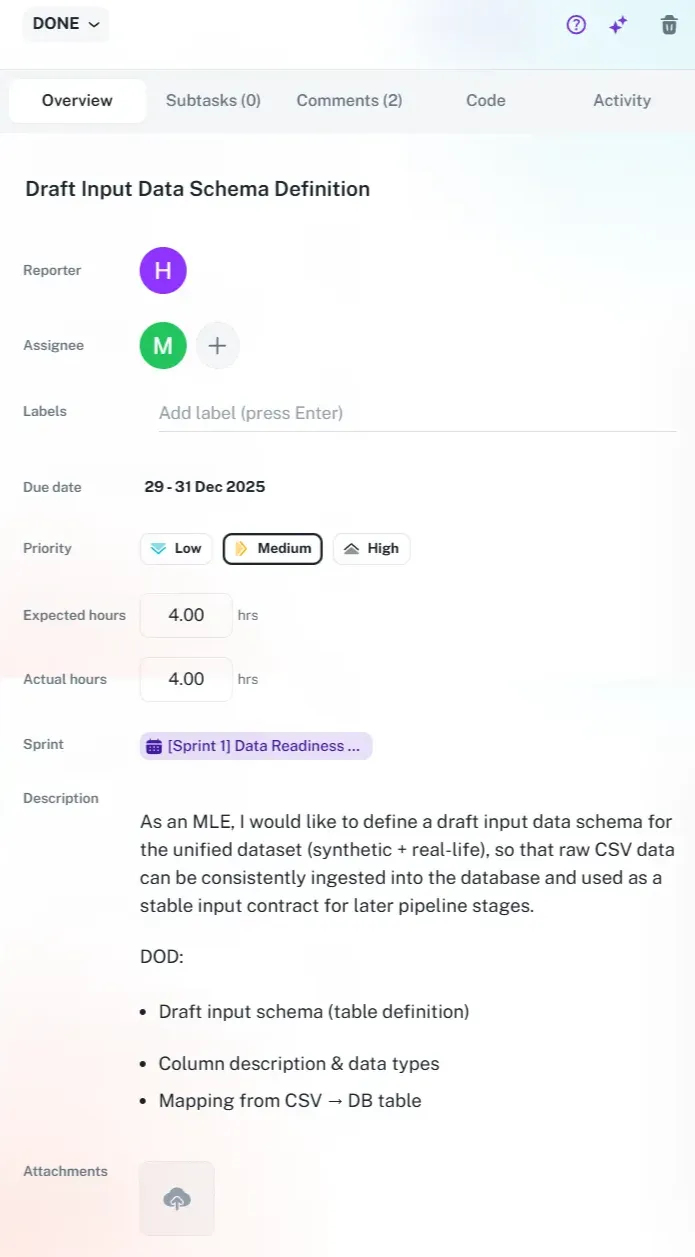
Key Fields to Configure:
Section titled “Key Fields to Configure:”- Description & Acceptance Criteria: Use the rich text editor to format your requirements. You can use bolding, bullet points, and headers to make the deliverables clear.
- Priority: Set this to Low, Medium, or High. This is crucial for the Umaku “Descoping Agent,” which uses priority to suggest removing low-value tasks if a sprint falls behind.
- Time Tracking:
- Expected Hours: How long should this take?
- Actual Hours: How long did it take? (Update this as you work to track velocity).
- Sprint Context: Ensure the ticket is linked to the correct sprint (e.g., Sprint 4 - Performance) so it appears on the correct board.
-
Manage Workflow on the Board
Section titled “Manage Workflow on the Board”The Umaku board is a living visual of your team’s progress. As you work, you will move tickets through various stages.
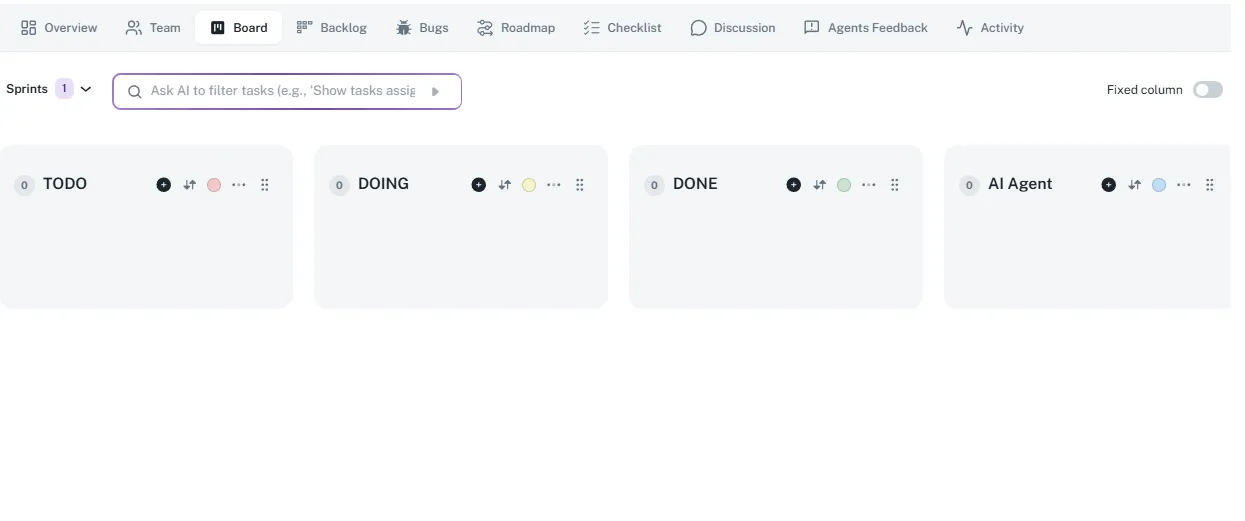
Figure 2: The Umaku Board with “TODO”, “DOING”, and “DONE” columns.
actions:
Section titled “actions:”- Drag and Drop: Simply click and hold a card to move it from one column to another .
- Reorder: Drag cards up or down within a column to change their priority stack rank.
- AI Search: Use the search bar to filter the board using natural language, such as “Show me tasks assigned to Ahmed.”
-
Link Your Code
Section titled “Link Your Code”This is where Umaku shines. To enable AI verification, you must tell Umaku which code belongs to this ticket.
- Open the ticket and click the Code tab.
- Paste URL: Copy the full URL of your GitHub commit (e.g., github.com/…/commit/a123…).
- Add: Click the Add button. Umaku will verify the link and display the commit author and timestamp.
Figure 3: The Code tab allows developers to manually link specific commits to a task.
-
Request AI Code Review
Section titled “Request AI Code Review”Before marking a ticket as DONE, you can ask Umaku to act as a reviewer. The AI will read the code you linked in Step 5 and compare it against the Acceptance Criteria you defined in Step 3.
- Click the Sparkles (✨): Located in the top-right header of the ticket.
- Add Context: A modal will appear. You can add specific instructions like “Check if this SQL query is optimized for large datasets.”
- Submit: Click Request AI Code Review.
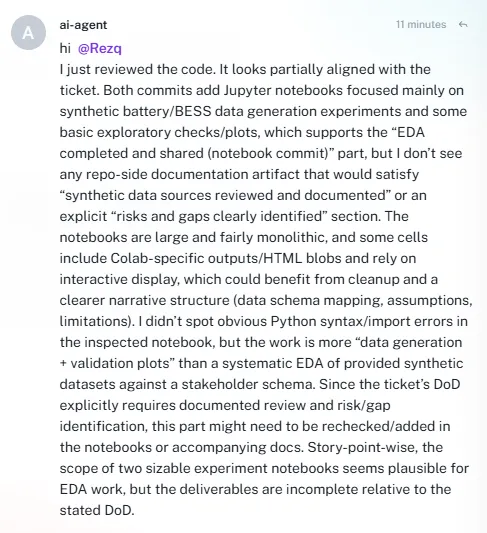
Figure 4: The AI Review modal allows you to guide the agent’s focus before it analyzes your code.
The Result: The Umaku Agent will analyze your work and post a detailed review in the Comments section of the ticket, mentioning you so you are immediately notified of any issues or approval.